Today, I scanned. I have accumulated just over 30 Polaroids since January. Usually I scan them the same day, but I haven’t been doing that.
This is probably going to take me a while—particularly if I am to keep plugging away at the book.
Why will it take me a while? Well, it all comes down to the vagaries of scanning film, with Polaroids adding their own peculiar brand of fun to the mix.
With the typical film photograph, you scan the photo, then you go into Photoshop to clean it up so that it resembles what you’re used to seeing when you look at the physical print. If you skip the Photoshop part, then you’ve got dust and the occasional bits of digital garbage every time you look at the digital image.
When working with Polaroids, add Newton’s rings to the list of evils that must be addressed. I’ll cheat by linking to Wikipedia for the definition/description. I can say, though, that they are a frequent occurrence when scanning Polaroids of the SX-70 variety. Basically, they appear because it is not possible to lay a given Polaroid completely flat on the scanner glass, which means that light will do its thing between the two reflective surfaces (i.e., the scanner glass and the protective layer of the photo).
Sometimes, Newton’s rings do not show up in the scanned image. Most other times, though, they appear to varying degrees. Some Newton’s rings occur in areas of the image where they can be easily edited out. If they affect an area with lots of detail, or are large enough (or both), it becomes necessary to re-scan.
“But Kevin,” I hear you say, “aren’t you just going to risk getting Newton’s rings again when you re-scan?”
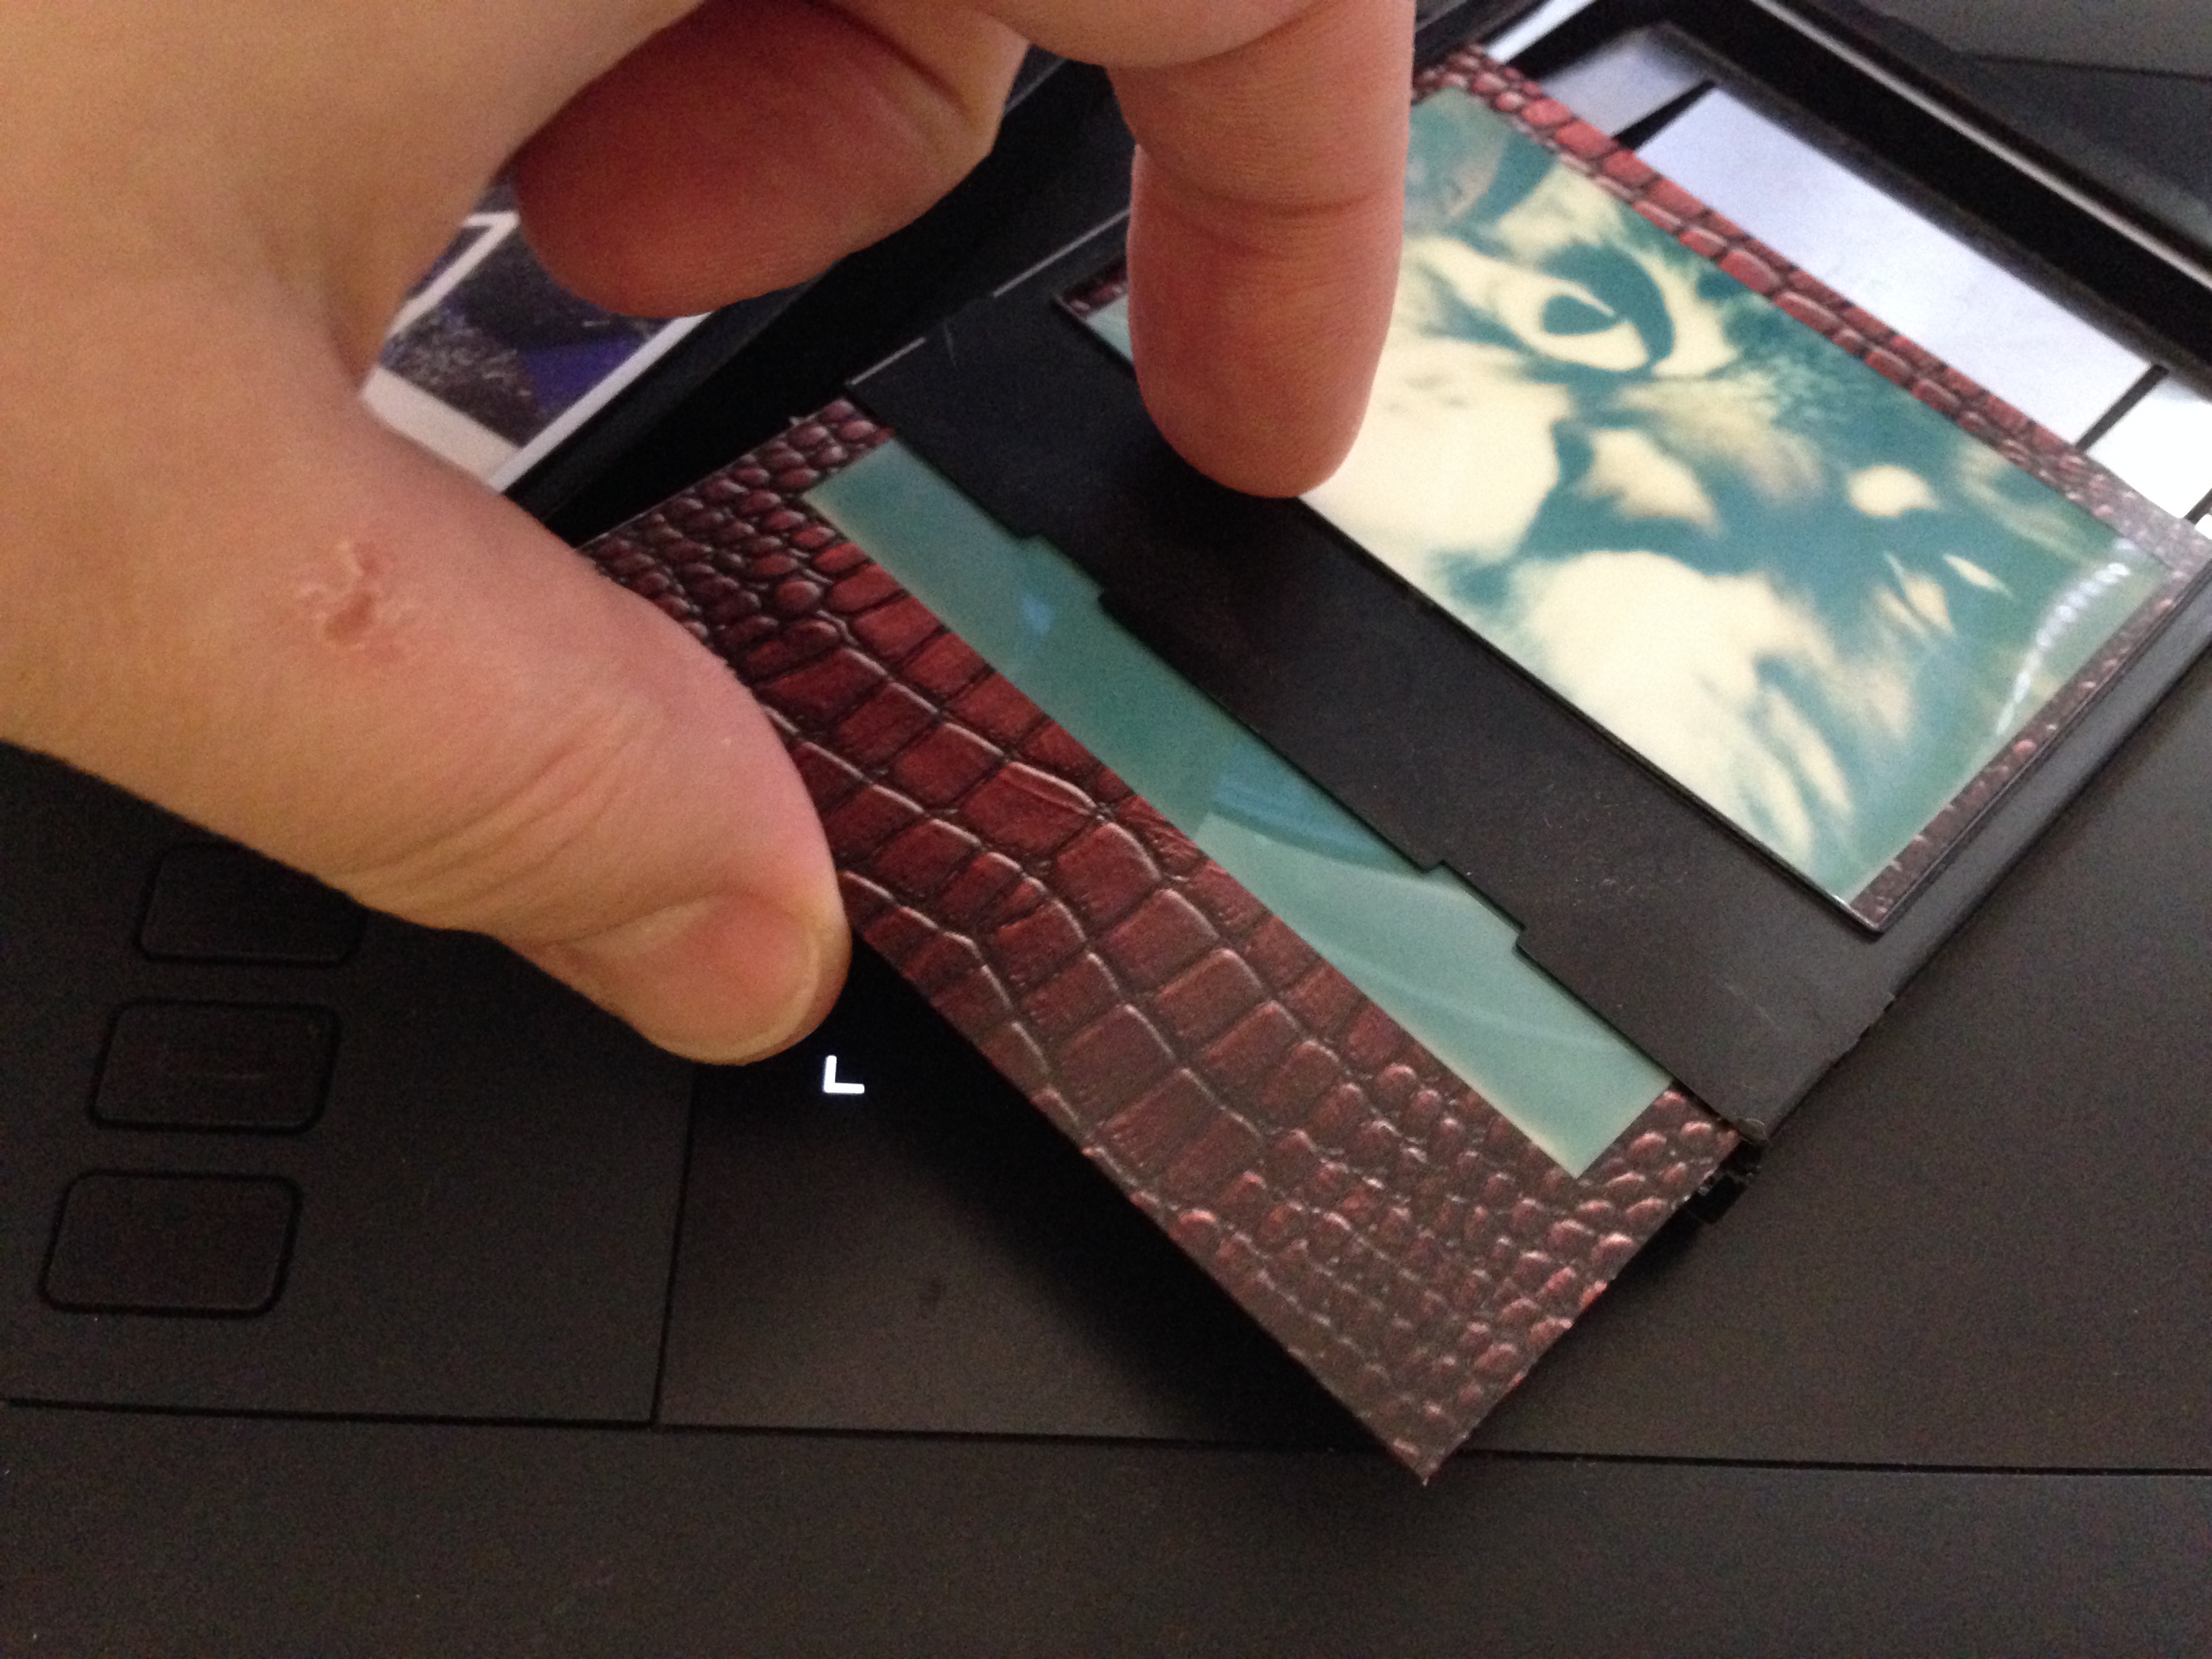
Yes. Unless you place the photo in some kind of holder that eliminates contact with the glass. The Impossible folks used to sell them, and Impossible film customers have come up with all sorts of methods for accomplishing that. Not being willing to shell out more bucks for one or more scan adapters, I hit upon the solution of using the empty film cartridges.
Now, this is not a particularly elegant solution to the problem—not least of all because it requires jumping through a few hoops to get to a scanned image with frame, since the cartridge covers most everything except the image area and maybe a quarter-inch of frame all the way around.
Here’s where I risk losing you with lots of detail, so here’s the basic poop:
- Put the photo you wish to re-scan in an empty film cartridge.

- Scan, enlarging ever so slightly (to compensate for the small added distance from the glass). I use 101%.

- Make your color/level adjustments to this image, and remove dust/scratches/other bits using your preferred method(s).
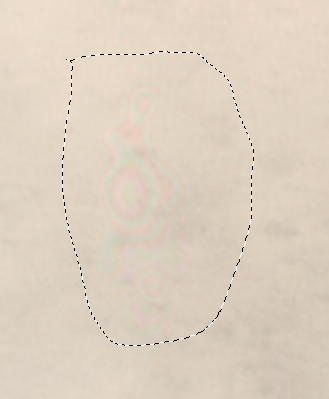
- Drag the finished image into the original scan; use a mask to preserve the frame from your original scan.
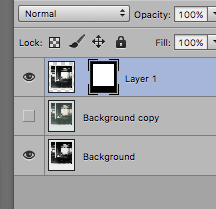
- Move the imported layer up until the full image looks like a regular Polaroid again.

- Flatten layers and sharpen, then save to your preferred format(s).


Although it takes extra time and effort, this method has the benefit of ensuring that the resulting image—which some ultra-purists might consider to be a composite (anything beyond basic dust removal, levels, and sharpening is usually frowned upon among Polaroid aficionados)—not only has no more Newton’s rings, but also comes entirely from your original photo.
Since I have at least six more photos to repeat this procedure with, I will first finish the photos that may have a place in the new book, then save the rest for a little bit later. Otherwise, I could be at this for up to a week…
(3 May 2016)

